Guide · Device Test Toolbox
Dead Pixel Test: How to Find Stuck and Dead Pixels on Your Screen
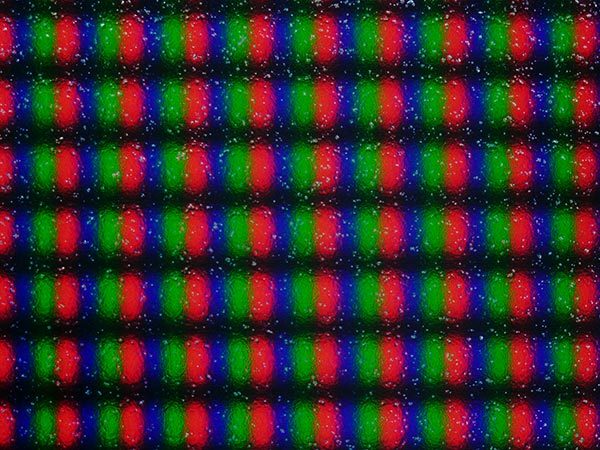
Every pixel on your screen is three tiny lights — red, green and blue sub-pixels — mixed to make every colour. When one of those lights fails, you get the most argued-about fault in computing: a single dot that will not behave. This guide explains the difference between dead and stuck pixels, shows you how to find them reliably, and sets out what can and cannot be done about them.
Dead, stuck and hot: three different faults
A dead pixel receives no power at all. It stays black on every background — black on white, black on red, black on everything. A stuck pixel has one sub-pixel jammed on: it shows as a constant bright red, green or blue dot, visible mainly on backgrounds that should not contain that colour. A hot pixel, mostly a camera-sensor term, is stuck fully bright white. The distinction matters because stuck pixels occasionally recover and dead pixels essentially never do — and because warranty policies treat them differently.
How to run a proper dead pixel test
You need flat, full-screen colours and a slow, systematic look. Open the dead pixel test on this site and run it full screen. Step through black, white, red, green and blue in turn, in a dim room, at your normal brightness. On each colour, scan the screen in sections — corners and edges included — and give your eyes a few seconds per section, because a single dot among millions is easy to look straight past.
Why those colours? Black reveals stuck and hot pixels, which glow against it. White reveals dead pixels, which show as black specks. Red, green and blue isolate the faulty sub-pixel: a dot that appears cyan on a red screen, for example, has a dead red sub-pixel. Note the position of anything you find, and photograph it against two different colours — that photograph is your evidence if you make a claim.
Dirt, pressure marks and other impostors
Before concluding anything, wipe the screen gently with a microfibre cloth. A speck of dust or a dried droplet mimics a dead pixel perfectly, and it is embarrassing to discover mid-argument with support. Also distinguish a single pixel from a pressure mark — a soft, cloudy smudge, often from a lid closed on an object — and from backlight bleed, a glow along an edge visible on black. Those are different faults with different causes, and our display gradient test is the better tool for judging them.
Can a stuck pixel be fixed?
Sometimes, and it is worth one careful attempt. Rapidly flashing colour-cycling tools claim to unstick sub-pixels by exercising them; evidence is anecdotal, but the attempt costs nothing and occasionally works on a genuinely stuck — not dead — pixel. Gentle pressure methods are riskier: pressing on a panel can crack it or create new faults, and on a device under warranty it can give the maker a reason to refuse your claim. Do not press hard, ever. If the pixel is dead, no software will revive it, because the fault is electrical, not logical.
What warranties actually cover
Here is the part nobody wants to hear: one dead pixel is often not covered. Manufacturers work to panel standards that permit a small number of pixel faults, and the allowance varies by brand, model and panel class — a premium line may promise zero bright defects while a budget line permits several. That is why the practical advice is about timing. Inside a retailer's returns window, returning or exchanging the device is usually simpler than a warranty claim, and a test on day one is what gives you that option. Test every new screen — monitor, laptop, tablet, phone, TV — the day it arrives.
Your two-minute routine for any new screen
Run the colour steps full screen, check the corners, then run the gradient test for banding and crushed blacks, and finish with the refresh rate test to confirm the panel runs at the speed you paid for. Two minutes, once, while returns are still easy. If you find a fault, describe it precisely — “one dead pixel, lower-left quadrant, black on all colours” — because precise descriptions get faster, better answers than “screen looks weird”. More on reading a full spec sheet, including panel figures, is in How to Check Your PC Specs and What They Mean.
Keeping a record that settles arguments
If you find a fault, spend sixty seconds documenting it properly, because a good record ends most disputes before they start. Photograph the pixel against a white background and against a black one, from close enough that the dot is unmistakable, and include one wider shot showing where on the screen it sits. Note the date you first saw it, the device model and serial number, and whether it is dead — black on every colour — or stuck on one colour, using the words from this guide. Save the order confirmation alongside the photos. Retailers and manufacturers process claims like this every day, and the ones with clear evidence move fastest. If the screen is a television, run the same colour steps from your normal viewing distance as well as up close: a pixel you cannot see from the sofa may not be worth a fight, while one that draws your eye during dark film scenes absolutely is. Evidence first, then the claim — in that order, every time.
Try it now: run the free Dead pixel & screen test — it runs in your browser, and nothing is uploaded.